

Submitted by evought on
After the change over in email providers, it may not be obvious how to synchronize contacts and calendars. The web host provides address book and calendar synchronization through the standard DAV protocol, supported by most email clients, but you may have to adjust some settings to get it to work. Following are instructions for the Mozilla Thunderbird email client:
- You will need to install the TbSync Add-on: Go to the Add-Ons Manager and use the search provider to find it. Then install Provider for CalDAV & CardDAV as well. Using "DAV" in the search bar may bring up both at once.
- Once the add-ons are installed, if you go to your list of installed extensions, you will see a wrench icon that lets you configure the extension. Click on that to bring up the TbSync Account Manager. You can get to this same dialog via the "TbSync" button in the bottom right of your main email window.
- Under the (empty) account list, there is a drop-down labelled "Account Actions". One of its options is "Add Account". Select that. Then select "CalDAV/CardDAV" and "Automatic Configuration".
- Now you will have a dialog box that lets you fill in your new account details. Account name is what this account will look like in your display and can be whatever you like, for instance, "LCSA". User name is your email address and password is the same one you use for your email. In "Server", fill in "https://lcmoauxiliary.org:2080". Now click the "Next" button. Thunderbird should verify the settings and offer a "Finish" button to save them.
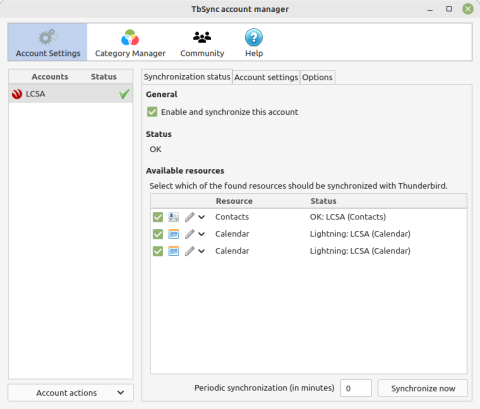
- When the next dialog comes up, click the "Enable and Synchronize" check box. It will read available resources from the server and ask you which to synchronize. Check the boxes for Address Book and both Calendar entries (one is an organization-wide calendar, the other is your personal calendar). You may then hit the "Synchronize Now" button. (Your contacts and calendars are likely empty to start.) When done, it should look like the image for this article. Close the dialog box.
Now, when you go to your address book ("Address Book" button at top of main email screen), you should have a bright red icon for your new account. You can drag and drop entries from your personal address book into this new account. You may set this account up on more than one machine and synchronize between them.